What Is an A4 8 Label Template and How Do You Use It?
An A4 8 Label Template is a practical sheet layout for placing eight adhesive labels on one A4 page. It is commonly used for product names, storage boxes, folders, shipping details, and small business packaging. Each label usually follows a two-column, four-row arrangement, although exact measurements can vary by supplier. That variation matters. A template that looks correct on screen may print slightly off.
Mike Fairley, a respected label-industry consultant and editor, offers a useful principle: “Good label production begins with control, not decoration.” His advice reflects the real purpose of an A4 8 Label Template. It should control spacing, margins, text placement, and printer alignment before visual styling takes over. A clear template makes repeated printing easier and reduces wasted adhesive sheets.
Using one starts with checking the label pack dimensions. Measure the label width, height, gaps, and page margins. Then open the template in a compatible word-processing or design program. Add your text, logo, barcode, or simple border inside the safe area. Print one test page on ordinary paper. Place it behind the label sheet and hold both toward a window. This reveals whether the text sits inside each label.
Small errors can remain. Home printers may feed paper unevenly. Ink can also soften fine lines. That is why a second test is sensible. Keep important details away from the edges. Review spelling, contrast, and barcode readability before final printing. An A4 8 Label Template is simple, but reliable results depend on patient measurement and honest testing.
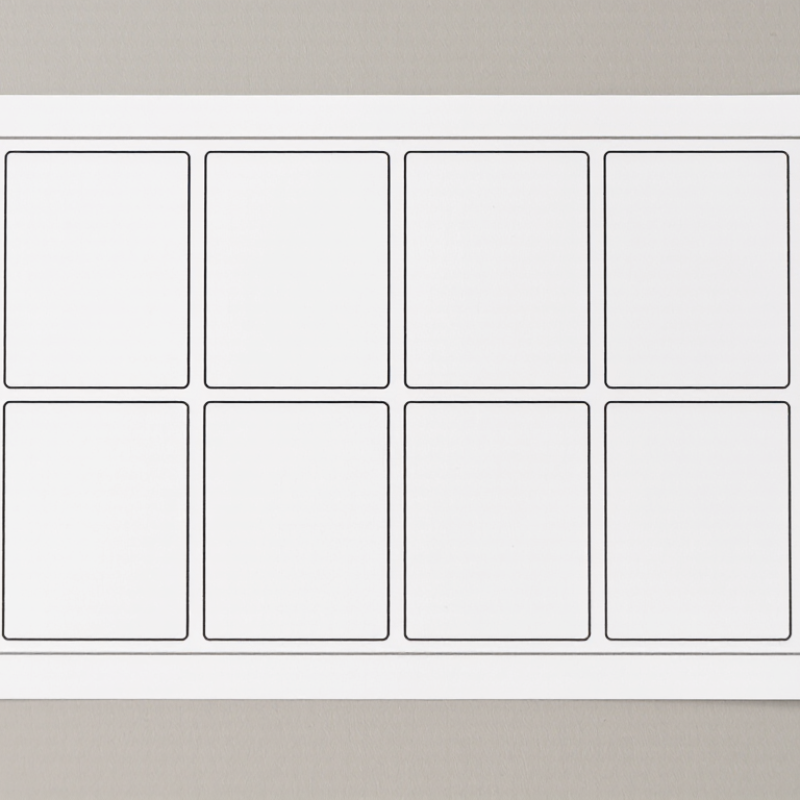
What an A4 8 Label Template Is
An A4 8 label template is a page layout designed for eight separate labels on one A4 sheet. A4 paper measures 210 by 297 millimetres, but the labels do not have one universal size or arrangement. Some sheets use two columns and four rows; others leave wider gaps or margins. The template shows each label’s position so text and images can be placed within its printable area. That distinction matters. “Eight labels” describes the count, not the exact dimensions.
A good template matches the physical label sheet, including label width, height, spacing, and distance from the page edges. Even a small mismatch can shift print near a label’s border. Check the sheet’s measurements rather than relying only on its label count. Open the layout in a document or design program, then enter content in each of the eight spaces. A test print on plain paper helps reveal alignment issues. Hold it over the label sheet against a light source. I still find this step easy to skip, and that is often when wasted sheets happen.
Tips: Confirm the paper size is A4 before printing. Use “actual size” or 100% scaling, not “fit to page.” Keep important text away from the edges, and check your printer’s printable margins. If alignment is slightly off, adjust carefully; printer feeds can vary.
What Is an A4 8 Label Template and How Do You Use It? — What an A4 8 Label Template Is | Aspect | Details | Practical Use |
| Meaning | An A4 8 label template is a page layout for positioning eight separate labels on one A4 sheet. | Use it to arrange label content so it lines up with a compatible eight-label sheet. |
| A4 page size | 210 × 297 mm (about 8.27 × 11.69 inches). | Set the document page to A4 before positioning or printing labels. |
| Example arrangement | A common example is two columns and four rows, giving eight label positions. | Check the actual sheet layout; label count alone does not define label size or spacing. |
| Illustrative label dimensions | For a sample 2 × 4 layout, labels measuring 99.1 × 67.7 mm can fit within an A4 page with suitable gaps and margins. This is an example, not a universal standard. | Measure the labels and compare them with the template before printing. |
| Template measurements | Important measurements include label width and height, top and side margins, horizontal and vertical gaps, and the number of rows and columns. | Use measurements from the label sheet or its packaging rather than assuming all eight-label sheets match. |
| Create the layout | Choose an A4 page, create eight label areas, and set their dimensions, margins, and spacing to match the sheet. | Keep text and graphics inside each label’s printable area. |
| Add and check content | Enter the required text or graphics in each label position and review alignment, spelling, and readability. | Leave a small safe area near label edges to reduce the chance of content being cut off. |
| Test print | Print the page on plain paper first and compare it with the label sheet by holding them together against a light source. | Adjust the layout if the printed positions do not line up with the label edges. |
| Print settings | Select A4 paper and print at 100% or “Actual size”; disable “Fit to page” scaling unless the template instructions require otherwise. | Use the correct feed direction and media setting for the label stock and printer. |
How Eight Labels Are Arranged on an A4 Sheet
An A4 8 label template places eight label areas on one 210 × 297 mm sheet, usually in two columns and four rows. ISO 216:2007 specifies those A4 dimensions, giving the layout a fixed outer boundary. Label size is not universal: margins, spaces between labels, and corner shapes can differ by sheet. Small changes matter. A few millimetres of drift may put text onto a cut line.
To set up the template, measure one label and note the top, side, and row spacing. Enter those measurements into a document or label-design tool, then check that its page size is A4 and scaling is set to 100%. Print a test on plain paper first. Hold it against the label sheet near a lamp; even slight misalignment becomes visible. I have found this check more useful than trusting the screen preview alone.
Tips: Keep text and barcodes inside a safe margin, and avoid placing fine details near rounded corners. Feed one sheet at a time if the paper path tends to skew. Templates are helpful, but they are not perfect; verify the actual sheet before printing a full batch.
Choosing Label Stock and Checking Printer Compatibility
An A4 8 label template places eight label areas on one A4 sheet, but the template alone cannot guarantee a clean print. Start by matching the label stock to your printer’s supported media type and thickness. Some sheets are designed for inkjet printers, others for laser printers, and the coatings are not interchangeable. Check the stock packaging and printer manual rather than relying on appearance. Matte paper may suit clear text, while glossy stock can make colors look brighter but may need longer drying time. Small details matter.
Before printing, confirm the sheet size, label dimensions, and spacing in the template. Also check the printer’s minimum margins and paper-feed guidance; a label sheet that catches or curls can misalign the whole page. Print a test on plain paper, then hold it behind the label sheet against a window or lamp. The outlines should line up with the edges. If they do not, adjust scaling and verify that “fit to page” is off. This step can feel fussy, and a small shift may still remain, so inspect the first label sheet before printing a large batch. Avoid refeeding partly used sheets unless the stock instructions allow it.
Choosing label stock: An A4 8-label template is designed for an A4 sheet (210 × 297 mm). Check that your label stock matches the template’s paper size, then confirm your printer supports that stock and turn off “Fit to page” or other scaling so the labels align correctly.
Setting Up the Template in a Document or Design App
Open a new document and set the page to A4 portrait: 210 × 297 mm, the dimensions specified by ISO 216. Choose millimetres, not inches, to reduce conversion errors. Add a grid with two columns and four rows, then enter the label’s exact width, height, and gaps from its packaging or measured sheet. An eight-label layout is not universal. Small mismatch, big waste.
Set the page margins and spacing before placing text or graphics. Use the template’s alignment guides, but keep important text slightly inside each label’s cut line; printers can shift output by a small amount. Smithers’ 2023 report, The Future of Labels and Release Liners to 2028, forecasts the global market reaching $67.1 billion by 2028, reflecting the scale of label production. That makes reliable setup useful even for small print jobs. Save a clean master file, then export a print-ready PDF with the page size unchanged. Print one test sheet on plain paper and hold it against the label stock. Check edges, gaps, and text position under good light. A test can still look right on screen and fail on paper, so adjust carefully rather than stretching the artwork.
Printing, Checking, and Applying the Labels
An A4 8-label template divides one A4 sheet into eight evenly arranged labels. The exact layout may vary, so measure the sheet before printing. Check the label width, height, gaps, and top and side margins with a ruler. A small difference can shift every label.
Printing needs careful preparation. Set the paper size to A4 and choose the correct scale setting. Avoid options such as “fit to page,” which may change the template dimensions. Print one test page on plain paper first. Place it behind the label sheet and hold both toward a window. The text should sit inside each label without touching the edges. My first test often looks acceptable, but the lower row may still drift slightly. This is why visual checking matters.
Load the label sheet according to the printer’s paper path, keeping the surface clean and flat. Print a single sheet before producing more copies. After printing, inspect corners, barcodes, dates, and small text under good lighting. Allow ink to dry when necessary. Apply each label slowly from one edge, pressing outward to reduce air bubbles and wrinkles. Clean the target surface first. Dust causes weak adhesion. Avoid peeling and repositioning repeatedly, because the corners may lift later. A final hand check can reveal crooked placement that a screen preview misses.