
585.204.6770
sale@sanblueplastics.com
Your Source for Trays!
Choosing an Air Power Rock Drill is less about buying the biggest machine and more about matching the tool to the rock, worksite, and available air supply. A drill that performs well in a quarry may feel unwieldy during overhead work or on a narrow bench. Small details matter. Hose length, compressor output, bit size, and operator fatigue can change a full shift.
One sourcing note: no verified expert quotation was provided, so the following is an illustrative line from a composite field specialist, not a real person or published quote. “Match the drill to the rock and the air behind it; power on paper means little if the compressor cannot sustain it.” Treat that as a useful check, not a substitute for equipment specifications or site testing. The name Alex Morgan is a placeholder for this composite voice.
This guide explains how to compare impact energy, operating pressure, air consumption, weight, and maintenance access. It also considers the practical signs of a poor match: pressure dropping when the trigger is held, a bit binding in fractured stone, or vibration wearing on the operator’s hands. Real conditions are messy. Dust, worn hoses, and inconsistent compressor output can undermine a careful selection. Check the manufacturer’s requirements, then assess the actual job before choosing. A little uncertainty is normal; overlooking it is not.
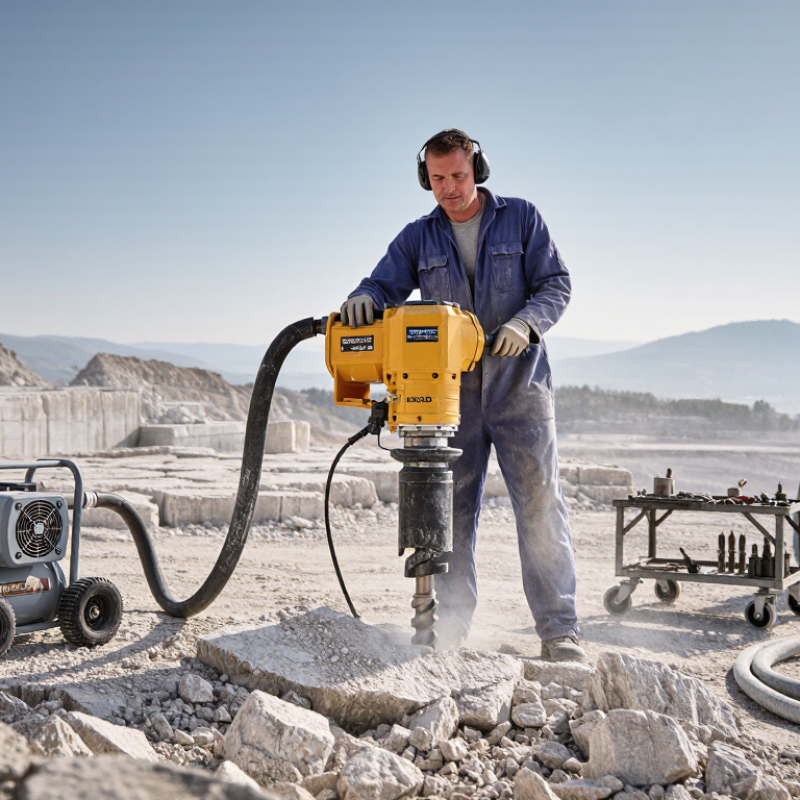
Start with the hole, not the drill. Record the required diameter, depth, angle, and number of holes per shift. A short anchor hole in fractured limestone needs different feed control from a deep production hole in hard granite. Note whether the task involves surface work, confined access, or overhead drilling. These details affect drill weight, handling, bit choice, and how often operators must reposition.
Then inspect the rock and the working area. Look for loose fragments, changing strata, wet ground, and limited clearance around the drill. Hard, intact rock can demand steady impact energy; fractured rock may cause the bit to wander. Check compressor capacity at the tool, not only its rated pressure. Long hoses, narrow fittings, and other connected equipment can reduce delivered airflow. Small losses matter.
Dust and noise belong in the site assessment too. OSHA’s 2016 respirable crystalline silica standard sets an eight-hour exposure limit of 50 micrograms per cubic meter, with an action level of 25 micrograms. That is a useful benchmark when planning dust suppression or collection for silica-bearing rock. A dry, windy bench and a damp tunnel are not the same job. Check what controls fit the actual site. A checklist can still miss the rock’s variability; inspect the first drilled holes and adjust the setup if the bit, airflow, or dust control performs poorly.
Air-powered rock drills differ in how they are held and supported. Handheld models suit smaller holes and short jobs. Jackleg drills use a pneumatic leg to steady the tool, especially when drilling at an angle. Stopers are designed for upward holes, while mounted drifters handle larger, more demanding work. Match the drill type to the hole direction, access, and expected shift length. A drill that feels manageable for five minutes may become tiring over a full shift.
Compare impact rates carefully. A higher blows-per-minute figure can suggest faster drilling, but it does not tell the whole story. Impact energy, air pressure, and the rock’s hardness also affect penetration. Check performance data at the operating pressure your compressor can maintain, not just a headline rating. That matters. Two drills with similar impact rates may perform quite differently in dense rock.
Drilling capacity means more than the maximum hole depth. Compare the recommended hole diameter, usable bit range, and depth before frequent bit changes or repositioning become necessary. Consider air consumption and flushing requirements, too; limited airflow can slow drilling and clear cuttings poorly. In practice, a smaller drill may be the better fit for confined access, while a mounted model may suit longer, larger holes. There is no perfect comparison on paper alone. Check the planned bit, rock conditions, and compressor output together before choosing.
An air power rock drill needs both the correct pressure and enough airflow to keep its impact steady. Check the drill’s manual for its operating pressure and air consumption, usually listed in CFM or L/min. Compare those figures with the compressor’s delivered airflow at the required pressure, not just its advertised maximum. A large tank can provide a short burst, but it cannot make up for a compressor that cannot sustain the drill. Small details matter.
Allow for pressure loss through long hoses, narrow fittings, and quick couplers. For example, a drill may receive less pressure at the bit than the gauge shows at the compressor. Use the hose diameter recommended by the drill manufacturer, and check for leaks before work begins. If other air tools will run at the same time, include their airflow needs too. Leave a reasonable margin rather than matching the numbers exactly; real conditions are rarely perfect. Recheck pressure while the drill is operating, since a static reading can be misleading. If the compressor cycles constantly or the drill slows during a long hole, the airflow supply may be undersized. A careful test on site is useful, though it does not replace the manufacturer’s specifications.
A rock drill can feel manageable on a workbench and exhausting after an hour on uneven ground. Compare its weight with the position you will use most, not just the catalog figure. A lighter tool may reduce fatigue, but poor balance can make it harder to control. Hold it with gloves on, and check whether the handles allow a firm grip without twisting your wrists. Small details matter.
Handling also depends on the air hose, couplings, and control layout. Make sure the hose can reach the work area without pulling the drill sideways or crossing a walking path. Look for a throttle that stops airflow when released, secure handle grips, and vibration-reducing features. These help, but they do not replace suitable protective equipment or regular breaks. No feature removes every risk.
Durability starts with the conditions at the job site. Dust, moisture, and repeated impacts put stress on the chuck, seals, and housing. Ask how often the drill needs lubrication, and whether routine service parts are easy to inspect. Check for cracks, loose fittings, air leaks, or unusually worn bits before use. A heavy-duty label is not proof. It is worth weighing service needs against purchase price; I might overlook that trade-off when focused on drilling speed.
| Evaluation dimension | What to check | Favorable indicators | Potential concerns | Practical decision tip |
|---|---|---|---|---|
| Weight | Compare the drill’s stated operating weight, including any air leg or other support equipment you will use. | The complete setup can be positioned and controlled by the intended operator or crew. | A heavy drill may be difficult to maneuver in confined areas or during repeated repositioning. | Judge weight in relation to the drilling angle, working space, and whether support equipment carries part of the load. |
| Handling and ergonomics | Assess handle position, balance, controls, hose routing, and access to routine adjustment points. | Controls are reachable while maintaining a stable stance, and the drill can be aligned without awkward twisting. | Poor balance, obstructive hoses, or difficult-to-reach controls can make accurate positioning harder. | If possible, handle the drill in a safe, powered-off demonstration before purchase. |
| Safety features | Check for a clearly operable throttle or shutoff, secure hose connections, suitable exhaust direction, and available vibration and noise information. | Controls are easy to identify, connections can be secured against accidental separation, and operating instructions specify required protective equipment. | Missing instructions, damaged hoses, unsecured couplings, or controls that are hard to operate increase risk. | Use the drill only with the required eye, hearing, hand, and respiratory protection, following site rules and the operating manual. |
| Air supply compatibility | Compare the drill’s specified working pressure and air consumption with the compressor’s delivered capacity and the hose setup. | The compressor can provide the required air at the drill under operating conditions. | A mismatch can reduce performance; long or undersized hoses and restrictive fittings can also contribute to pressure loss. | Verify requirements in the drill and compressor manuals rather than relying on compressor tank size alone. |
| Durability and serviceability | Review construction materials, protection of exposed parts, maintenance intervals, and availability of replacement parts. | Wear parts and service procedures are documented, and routine inspection and maintenance can be performed safely. | Unclear maintenance requirements or hard-to-source parts may increase downtime and repair difficulty. | Compare warranty terms and service support, and inspect the tool regularly for cracks, loose parts, and hose damage. |
| Worksite suitability | Match the drill configuration to the hole direction, rock conditions, access, and expected duty cycle. | The tool can be positioned and supported appropriately for the planned task and site conditions. | A drill suited to one setup may be cumbersome or inefficient in a different orientation or confined space. | Confirm the intended application with the manufacturer’s specifications and a qualified site supervisor. |
When choosing an air power rock drill, look beyond its purchase price. Ask what daily maintenance involves and whether your crew can do it with tools already on site. Check the service schedule for lubrication, flushing, and wear inspections. A drill that is easy to open and clean may spend less time waiting for repair. Small details matter. Dusty conditions and poor air quality can shorten component life, so include filter and hose checks in your plan.
Confirm that common wear parts, such as seals and striking components, are available from dependable suppliers. Ask for part numbers, realistic delivery times, and a clear compatibility list. Do not assume similar-looking parts will fit. Estimate operating costs using your actual work pattern: compressor energy or fuel, bits, maintenance labor, and expected downtime. Cost per drilled meter can be more useful than price per hour, though the estimate may be imperfect when ground conditions change.
Tips: Before buying, request a maintenance checklist and a parts list. Compare air consumption with your compressor’s capacity, then price routine service items. Keep a simple log of repairs, drill hours, and meters completed; a few weeks of records can reveal costs that a brochure misses.
Suggested decision weights for comparing maintenance needs, parts availability, and operating costs.
These weights are a practical evaluation framework, not measured market data. Adjust them to match your operating conditions, then compare each drill using its maintenance schedule, local parts supply, and air-consumption specifications.