
585.204.6770
sale@sanblueplastics.com
Your Source for Trays!
Choosing Clear Tempered Glass in 2026 starts with how and where it will be used. A shower screen, storefront panel, and glass tabletop face different demands. Check the required dimensions, thickness, edge finish, and mounting method before comparing prices. Then inspect the product documentation. It should identify the glass as tempered and provide clear details about its specifications and intended use.
Look closely. In bright daylight, subtle waviness or reflections can reveal uneven optical quality. Ask the supplier how panels are inspected, how edges are finished, and what options suit your installation. A lower price may look attractive, but replacement costs can change the calculation. Details matter. For transparency, the quotation below is an illustrative line from a fictional glazing specialist, Elena Park, not a verified statement from a real expert: “Choose glass for the conditions it must handle, not only for the way it looks on delivery.” Treat that as a practical reminder, not technical certification.
This guide explains how to compare clarity, thickness, safety documentation, fabrication quality, and supplier support. It also considers where extra features may help—and where they may add cost without solving a real problem. Requirements vary by project, so confirm specifications with a qualified glazing professional before ordering. Even careful comparisons have limits; the right choice depends on the frame, hardware, and actual installation conditions.
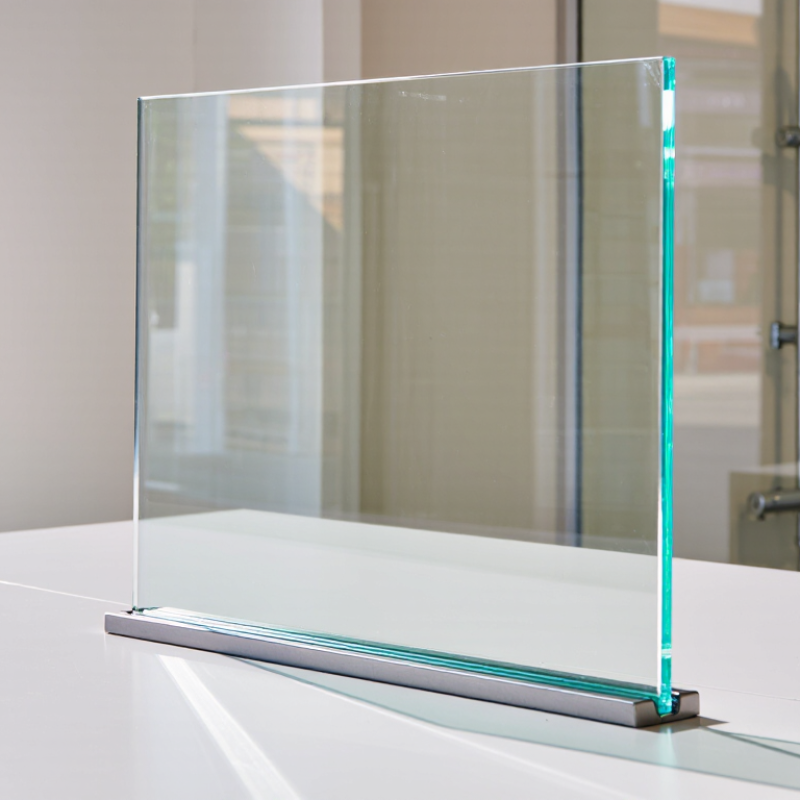
Clear tempered glass begins as ordinary flat glass, then receives controlled heating and rapid cooling. This treatment places the surfaces under compression, improving resistance to impact and temperature changes. It does not make the pane unbreakable. A small chip at an edge can still become a failure point.
ASTM C1048-18 specifies a minimum surface compression of 69 MPa (10,000 psi) for fully tempered flat glass. That figure is a manufacturing performance threshold, not a promise that glass cannot break. Tempered glass typically fragments into many small pieces when it fails, rather than large, sharp shards. Still, the break pattern depends on the glass and the damage that triggered failure.
“Clear” describes appearance, not a single optical specification. Standard clear glass can show a faint green cast, especially along a thick edge, while low-iron glass reduces that tint. Check the supplier’s visible-light-transmittance data and the panel’s thickness before comparing samples. Hold each sample against a white background. Look closely. I would not judge clarity from a small phone image; lighting and screen settings can distort the color.
Define the job before choosing thickness. A shower panel, cabinet door, and exterior railing face different conditions. Note the panel’s height, width, support points, nearby hardware, and expected impact. Measure twice. Thickness should be selected for the panel size and installation, not appearance alone; ask a qualified glass professional to verify the specification.
Decide what “clear” means in the actual space. Standard clear glass may show a faint green tint along a thick edge, especially beside white tile or pale stone. View a sample in the room’s lighting. Check for reflections, visible distortion, and how easily fingerprints or water spots will show. Small details matter. If the glass needs holes or shaped edges, settle those dimensions before tempering, since tempered glass cannot be cut or drilled afterward.
Consider how the glass could break and what happens next. Tempered glass is heat-treated to break into smaller pieces than ordinary annealed glass, but it is not unbreakable. Confirm that the chosen product and hardware suit the intended use, and ask for written specifications rather than relying on a generic thickness chart. This is easy to overlook on a neat drawing; the real frame may be less forgiving.
Choosing clear tempered glass starts with thickness, but thickness alone tells little. A 6 mm pane may suit a small cabinet door; a broad shower panel may need thicker glass and proper support. The right choice depends on the pane’s size, fittings, use, and installation. Ask for the recommended thickness in writing, not just a guess at the counter. Details matter.
Check that the glass meets the safety standard required where it will be installed. Request test or conformity documents, and confirm the glass is marked when applicable. Tempered glass is designed to break into smaller pieces than ordinary annealed glass, but it is not unbreakable. Edge chips and poor installation can still create risk. Inspect corners and edges before fitting.
Optical clarity is easier to judge in person. Hold a sample beside a straight window frame and view it from several steps away. Look for a green tint, waviness, bubbles, or reflections that bend the frame. Check in daylight and under indoor lamps, since lighting changes what you see. I would not rely on a tiny sample alone; large panes can reveal distortions that are hard to notice at a desk. That judgment is imperfect. Ask for a larger sample or inspect a finished pane when appearance is critical.
For clear tempered glass, inspect the edges before judging the polished face. A smooth, consistent arris helps reveal careful processing; chips, shelling, or uneven corners deserve questions. Edges and cut-outs should be finished before tempering, since later grinding can cause breakage. Small details matter. Ask the supplier to state the edge type, tolerances, and inspection method in writing.
Coatings affect performance, even when the glass looks clear. The U.S. Department of Energy’s Energy Saver guidance estimates that windows account for 25–30% of residential heating and cooling energy use. Compare whole-window U-factor and solar heat gain coefficient, not glass appearance alone. The National Fenestration Rating Council’s ratings report these measures separately. Ask which coating surface is specified and whether the quoted values apply to the complete window assembly.
Supplier quality needs evidence, not polished claims. Request batch traceability, tempering records, coating specifications, and inspection criteria. ASTM C1048 defines heat-treated flat-glass categories, giving buyers a shared technical reference. Check that drawings show holes, notches, and edge details before production. Then review a sample under bright side lighting for scratches, roller marks, and coating haze. I would not accept “optically perfect” without agreed limits; visual judgment varies, and that wording alone is weak purchasing protection.
How to Choose the Best Clear Tempered Glass in 2026
Accurate measurements make installation safer and help prevent costly reordering. Measure the opening at several points, since walls and frames may not be perfectly square. Record width, height, glass thickness, and any required cutouts. Leave clearance for hinges, seals, and movement, following the installer’s specifications. Small gaps matter. I once assumed two corners matched; they did not. Check measurements again before ordering, and ask a qualified glass professional to confirm unusual shapes or large panels.
Tips: Use a steel tape and write down each measurement immediately. Photograph the opening, including nearby handles and fixtures. Confirm who supplies fasteners and whether the mounting surface can support the panel’s weight. Don’t guess.
Plan maintenance before choosing the glass. Ask how its edges will be protected and whether the installation allows easy access for cleaning. After installation, use a soft microfiber cloth and a mild, non-abrasive cleaner. Avoid rough pads, which can scratch nearby hardware or damage protective finishes. Check hinges, clamps, and seals periodically for looseness or wear. Tempered glass is designed for strength, but it is not unbreakable; a small chip or damaged edge deserves professional attention. Some cleaning spots return faster than expected, especially near showers, so a quick routine may work better than occasional heavy scrubbing.
| Decision Area | What to Confirm | Practical Guidance | Before You Order |
|---|---|---|---|
| Intended application | Where the glass will be installed and whether people could fall against or through it. | Use safety glazing where required by applicable building codes, such as certain doors, shower enclosures, and glass near floors or stairs. Requirements depend on location and installation. | Check local code requirements and confirm that the product is certified for the intended use. |
| Opening measurements | Width and height at the top, middle, and bottom; note whether the opening is square, level, or plumb. | Record each measurement rather than assuming the opening is perfectly uniform. For framed installations, the glass size usually needs installation clearance. | Have the installer or glass fabricator specify the final glass dimensions and required clearances before ordering. |
| Thickness and panel size | Glass thickness, panel dimensions, support locations, wind exposure, and expected loads. | Common nominal thicknesses include 4, 6, 8, 10, and 12 mm. The suitable thickness depends on the panel size, support, load, hardware, and local requirements; thickness alone does not establish suitability. | Request a project-specific recommendation from a qualified glazier or structural professional when panels are large, overhead, or exposed to significant loads. |
| Clear-glass appearance | Color at the edges, transparency, reflections, and how the glass looks beside existing materials. | Standard clear glass can show a green tint, especially at thicker edges. Low-iron clear glass can reduce this tint, but appearance and cost vary. | Review a physical sample at the installed thickness and in the lighting conditions where it will be used. |
| Edge finish and cut-outs | Exposed edges, holes, notches, and hardware locations. | Specify polished or otherwise appropriate finished edges where they will be visible or handled. Holes, notches, and edgework must be completed before tempering; tempered glass cannot be cut or drilled afterward. | Check drawings and hardware measurements carefully, since incorrect dimensions generally require a replacement panel. |
| Installation and support | Frame or channel dimensions, setting blocks, fasteners, seals, and contact points. | Glass should be supported as designed and protected from direct contact with hard metal or masonry. Use compatible gaskets, setting blocks, and sealants specified for the system. | Confirm the installation method and hardware compatibility before fabrication; avoid forcing a panel into an undersized opening. |
| Delivery and handling | Access route, lifting needs, panel weight, and a safe place for temporary storage. | Large or thick panels can be heavy and difficult to maneuver. Keep glass upright on suitable padded supports and protect corners and edges from impacts. | Plan delivery and installation with people and equipment appropriate for the panel size and weight. |
| Cleaning and maintenance | Water deposits, fingerprints, nearby construction work, and the cleaning products allowed by the installer. | Use a soft cloth or squeegee with clean water and a mild, non-abrasive glass cleaner. Avoid abrasive pads, harsh chemicals, and scraping near exposed edges or coated surfaces. | Follow the glass and hardware care instructions; periodically check seals, fasteners, and supports for wear or loosening. |
| Final order check | Quantity, finished dimensions, thickness, edgework, holes, glass type, and delivery details. | Tempered glass is made to specified dimensions, and changes after tempering are not possible. A clear written specification helps prevent mismatches. | Approve the final measurements and fabrication drawing before production begins. |